Configuring a device for Z-Push is simply a case of adding a Microsoft Exchange or Corporate account to your connected accounts. The connection will be configured by specifiying the IP address or hostname of the server running Z-Push. Please disable SSL, unless SSL has already been setup on the Apache server. Apart from username and password some clients also ask for your domainname. This is ignored inside of Z-Push, so you can either leave it empty or give a random string for it.
Once the mobile device has been setup, it should be possible to synchronise the device simply by clicking the Sync button in your client application.
8.2.1. Android based configuration
The following steps are applicable for most Android devices:
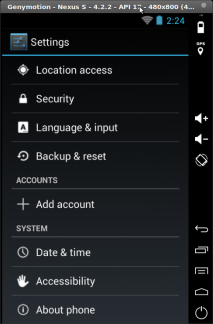
Go into your settings screen and scroll down to the accounts part. There you have to select Add account.
Kuva 8.1. Android Settings
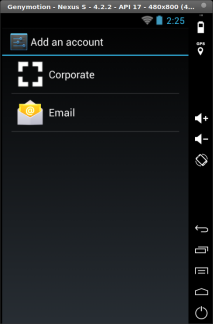
Select the ActiveSync account type (in most cases Corporate or Microsoft Exchange).
Kuva 8.2. Account Type Selection
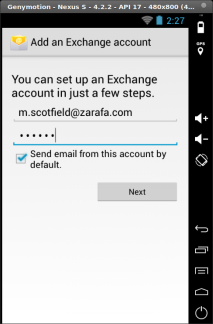
Android wants to autodiscover your ActiveSync server and needs your eMail and password for this.
Kuva 8.3. Account Details
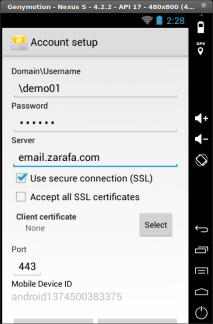
Afterwards you have the possibility to specify your exact username and server address if needed (would otherwise have been m.scotfield as username and zarafa.com as server address).
Kuva 8.4. Server Address
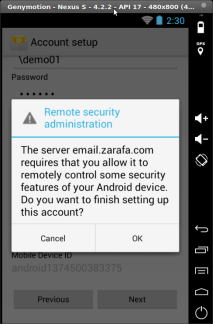
As soon as you have clicked next your device will give you a popup notifying about needed policies for the server connection. You will be prompted to accept these policies later in the setup.
Kuva 8.5. Remote Administration
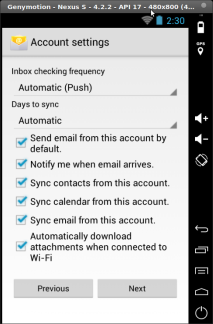
Before accepting the sync policies you have to choose the frequency for checking the server (Push by default) as well as what to sync (for example contacts and calendar).
Kuva 8.6. Sync Frequence and other settings
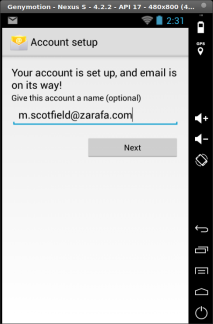
If you have multiple accounts connected to your device you can also specify an identifying name for your connection.
Kuva 8.7. Optional Profile Name for the Connection
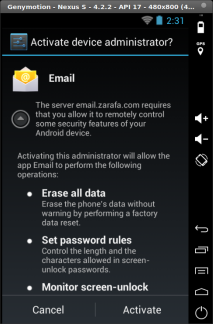
Finally accept the server policies.
Kuva 8.8. Accept Server Policies
After accepting the policies for device will perform an initial sync.
Kuva 8.9. Your device has been configured
8.2.2. Windows Mobile based configuration
Seuraavat ohjeet on laadittu PocketPC:lle, mutta ne ovat sovellettavissa WM 5/6:een sekä Nokian Mail for Exchange -sovellukseen:
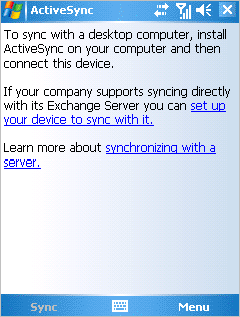
Avaa ActiveSync ja valitse aseta laitteesi synkronoimaan sen kanssa.
Kuva 8.10. ActiveSyncin esittely
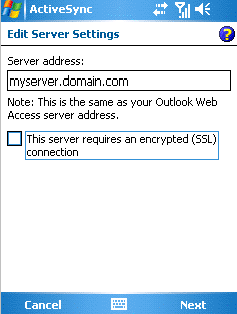
Kirjoita palvelinosoitteesi (ilman http-tekstiä tai muita URL-osia).
Kuva 8.11. Palvelimen osoite
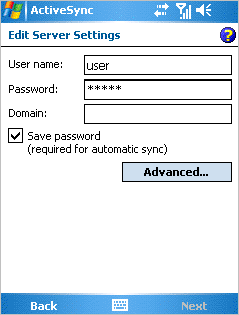
Määrittele käyttäjätunnuksesi sekä salasanasi. Sinun tulee määritellä myös domain, mutta sitä ei käytetä Z-Push:issa, joten voit kirjoittaa kohtaan vain domain tai jonkin muun satunnaisen tekstin. Valitse tallenna salasana mikäli haluat synkronoida automaattisesti.
Kuva 8.12. Käyttäjätilin tiedot
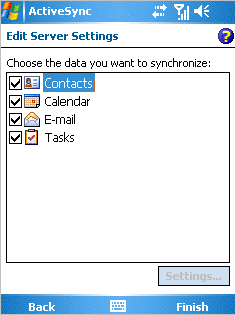
Valitse synkronoitavat kohteet.
Kuva 8.13. Synkronointiasetukset
Klikkaa Viimeistele ja aloita synkronointi klikkaamalla Synkronoi.
8.2.3. iPhone-pohjainen konfigurointi
Seuraavat vaiheet ovat sovellettavissa iPhonelle:
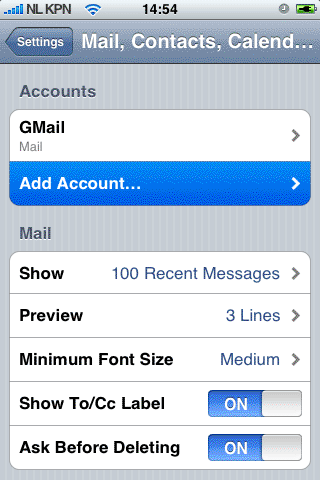
Avaa Asetukset ja valitse Posti, Yhteystiedot, Kalenterit -kohtaa.
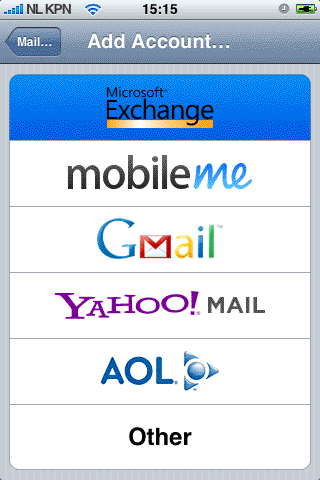
Valitse Lisää käyttäjätili... ja sen jälkeen Microsoft Exchange.
Kuva 8.14. Asetukset kohteille Posti, Yhteystiedot, Kalenterit
Kuva 8.15. Valittu protokolla/palveluntuottaja
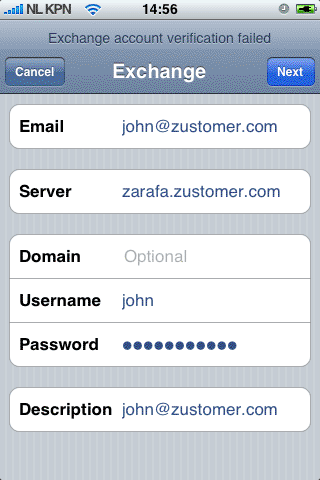
Syötä käyttäjätiedot ja valitse Seuraavaa.
Kuva 8.16. Käyttäjäasetukset
Laite yrittää ottaa yhteyttä palvelimeen. Mikäli palvelin ei ole yhdenmukainen zustomer.com:in kanssa tässä tapauksessa, yhteydenmuodotus epäonnistuu. Yhteydenmuodostus epäonnistuu myös, mikäli palvelinta ei ole konfiguroitu SSL-yhteyksille. Iphonessa SSL on oletuksena sallittu.
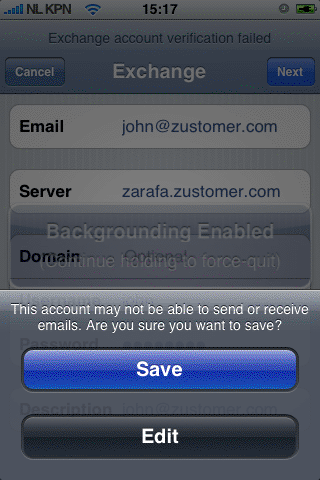
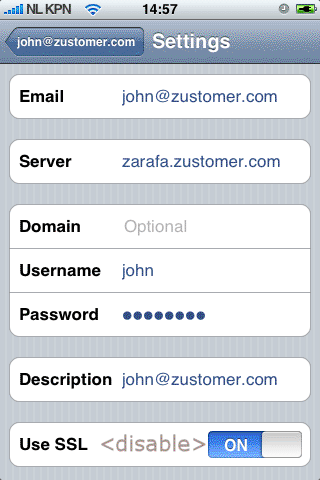
Uusi valintakenttä, Palvelin ponnahtaa esille. Syötä oikea palvelinosoite tai IP, jos tarpeen.
Kuva 8.17. Ylimääräinen palvelinkenttä
Mikäli SSL ei ole saatavilla, yhteydenmuodostus epäonnistuu. Valitse Tallenna säilyttääksesi nykyiset käyttäjätilin asetukset. Siirry vastaluotuun käyttäjätiliin, valitse Käyttäjätilin tiedot ja estä Käytä SSL:ää.