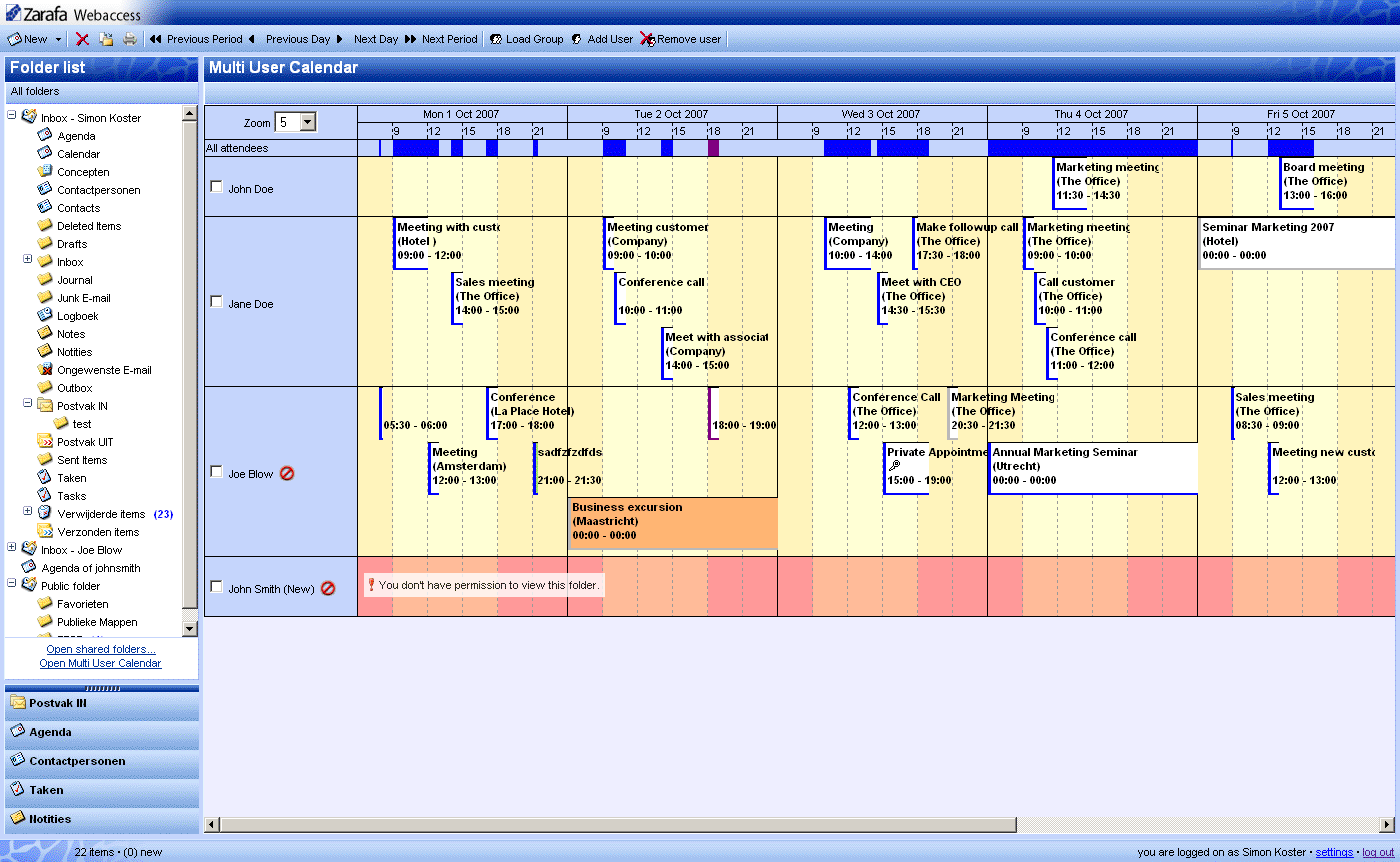
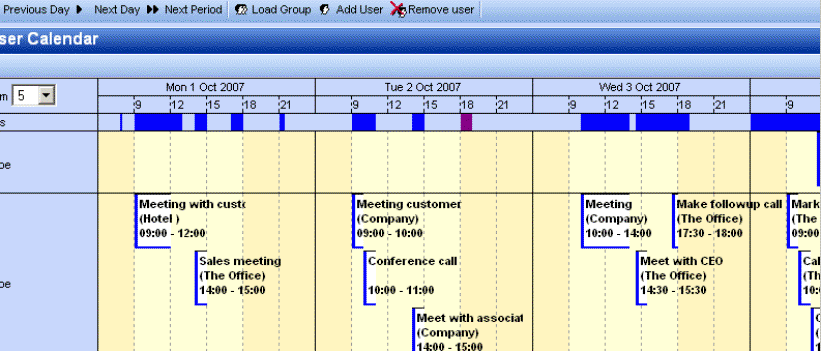
Opening other users calendars side-by-side is possible with the Multi User Calendar (see Figura 2.33, «Multi User Calendar»): click on the Open Multi User Calendar link in the bottom of the folder pane.
Nota
This feature is not available in the community version of Zarafa.
Figura 2.33. Multi User Calendar
2.7.1. Adding a user to the time line
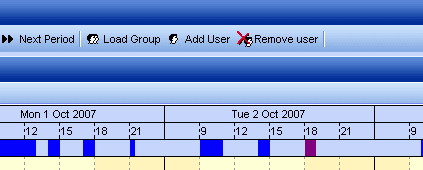
Click on the Add User button in tool bar at the top (see: Figura 2.34, «Timeline»). The Address Book window will open.
Figura 2.34. Timeline
Click on a user to select that person and click on the button Ok.
The user is added to the time line and his/her appointments are loaded.
2.7.2. Deleting a user from the time line
Select the user by clicking on the check box in front of their name. Click on the button Remove User in the tool bar at the top.
2.7.3. Loading a group of users to the time line
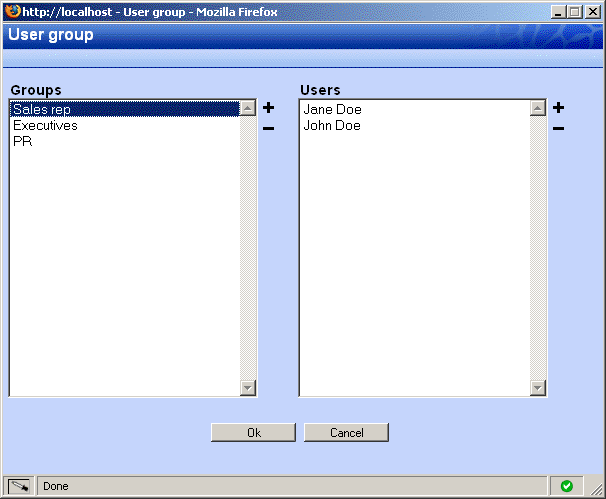
Click on the button Load Group… in the bar at the top. The “Group Window”, as shown in Figura 2.35, «User groups», will open.
Figura 2.35. User groups
Select a group in the left list and click on the button Ok.
The group of users is added to the time line and their appointments are loaded per user.
2.7.4. Load group dialog
The Load Group dialog can be opened by clicking on the button Load Group in the bar at at the top.
The dialog consists of two lists. The list to the left shows the different groups that have been created. The list to the right displays all the users that are members of a particular group when that group has been selected from the left list.
To add or delete a group or user use respectively the plus or minus buttons on the right side of the list. Remember that a group must be selected prior to adding or removing a user.
2.7.5. No Access message
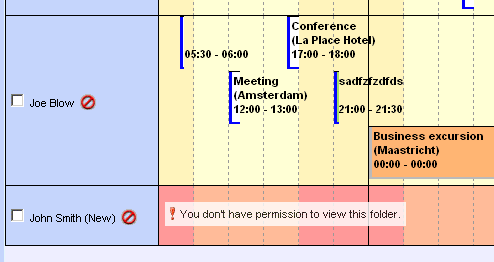
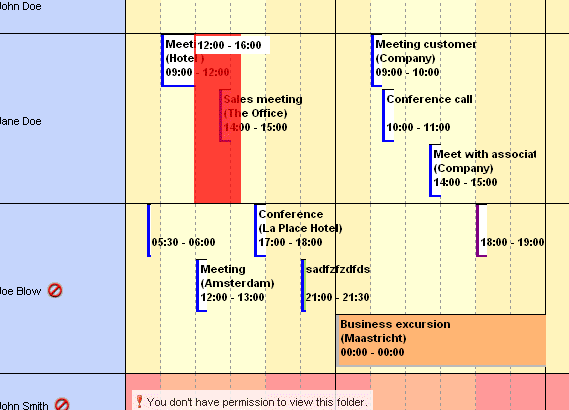
When using the Multi User Calendar with several calendars of collegues open, one might not have permission to create appointments for a colleague, or not have permission to view the content a colleague’s calendar at all. In case one does not have permission to create an appointment for a colleage, an icon is placed after the colleague’s name as an indicator. In case one has no access to the calendar at all, the entire time line for that user is marked red and a warning message appears as shown in Figura 2.36, «No Access message».
Figura 2.36. No Access message
2.7.6. Cumulative free/busy information
The row directly above the time lines (see: Figura 2.37, «Free busy information for all attendees») contains the cumulative free/busy information of all users loaded in the Multi User Calendar. The bar also shows whether the appointments are set as Tentative, Busy or Out of Office.
Figura 2.37. Free busy information for all attendees
2.7.7. Create or delete an appointment
To create an appointment simply double click on the time line of the user an appointment has to be created for. This will open a new appointment window where the appointment can be created.
To delete an appointment: double click on the appointment to open it, then use the red cross in the toolbar of the appointment dialog to delete it.
2.7.8. Moving appointments
Moving an appointment can be achieved by opening the appointment and changing the start time. In practise most users will prefer moving appointments by using drag-and-drop. To drag an appointment the user clicks and hold down the left mouse button on an appointment and moves (drags) the mouse over the time line to the desired location, to release the mouse button at that point. To help place the appointment a red overlay (see: Figura 2.38, «Dragging appointments») follows the mouse to indicate new place of the appointment when the mouse is released at that point.
Figura 2.38. Dragging appointments
It is also possible to drag an appointment to the store of another user (provided enough permissions are granted). Simply move the mouse to another user’s row and the red overlay will follow.
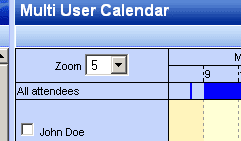
2.7.9. Changing zoom level
It is possible to quickly zoom in on the time line by changing the zoom level using the drop down menu (see: Figura 2.39, «Zoomlevel») in the top left corner of the Multi User Calendar. This setting is not saved and will be reset to the default setting (as set in the settings dialog) next time the Multi User Calendar is opened.
Figura 2.39. Zoomlevel
2.7.10. Changing number of displayed days
The number of days that are loaded in the time line and the number of days that are visible at the same time (zoom level) can be set from the settings dialog: on the Calendar tab in the Multi User Calendar View section. These settings will be used whenever the Multi User Calendar is opened.
2.7.11. Browse time period
The Previous Period and Next Period buttons on the tool bar at the top of the page (see: Figura 2.40, «Buttons for changing time period») are used to view the next of the previous time line period. The Previous Day and Next Day buttons merely move the time line by a single day.